Maak je ontwerp met onze gebruikersvriendelijke Online Editor
Het maken van je eigen ontwerp kan lastig zijn, vooral als je geen ontwerper bent. Gelukkig bieden we een eenvoudige Online Editor waarmee je elk drukwerk eruit kunt laten zien alsof het door een professionele ontwerper is gemaakt.
Onze gebruiksvriendelijke Online Editor kan voor bijna al onze producten worden gebruikt, van Visitekaartjes tot Flyers, van Roll-up Banners tot Vlaggen tot Kaarten, Mokken, T-shirts, ... Op deze pagina geven we je wat tips om de beste ontwerpen te maken met onze Online Editor!
Happy Tip #1 - Krijg inspiratie van onze Design Templates
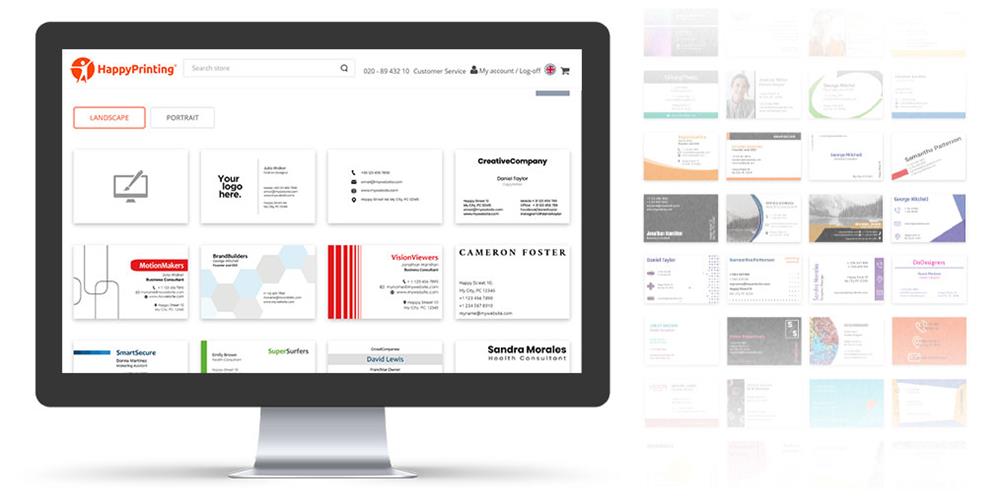
Voor veel van onze producten hebben we Design Templates gemaakt ter inspiratie en voor gebruik. Je kunt er één selecteren en deze vervolgens naar eigen wens aanpassen, of je kunt altijd het lege Template selecteren en je ontwerp helemaal zelf maken.
Wanneer je naar een productpagina op onze website gaat en naar beneden scrolt, zie je de optie 'Online ontwerpen', waarmee onze Online Editor wordt geopend. Voor veel producten hebben we diverse Design Templates die je kunnen helpen bij je ontwerp, als inspiratie of als uitgangspunt voor je eigen ontwerp.
Je kunt overweldigd raken door de vele keuzes die we bieden. Neem de tijd! Blader door de verschillende designs en kies er een of twee om inspiratie op te doen. Je kunt ook de eerste kiezen, een lege Template waarmee je jouw ontwerp helemaal zelf kunt maken. Onthoud altijd: een goed ontwerp kost tijd!
Happy Tip #2 - Kies een Achtergrond
Als je links op het tabje 'Background' klikt, kun je kiezen uit verschillende achtergronden voor je ontwerp. Je kunt ook zoeken naar een achtergrond die je wilt gebruiken of naar extra afbeeldingen die je als achtergrond voor je ontwerp wilt gebruiken in het tabblad 'Zoeken'. Typ gewoon wat je zoekt (bijv. 'Kat') en er verschijnen stockfoto's voor dat onderwerp.
Je kunt de afbeeldingen zelfs bewerken door ze aan je ontwerp toe te voegen, ze te selecteren en vervolgens bijvoorbeeld een Filter te kiezen of de achtergrond van de afbeelding transparant te maken. Alles is mogelijk!
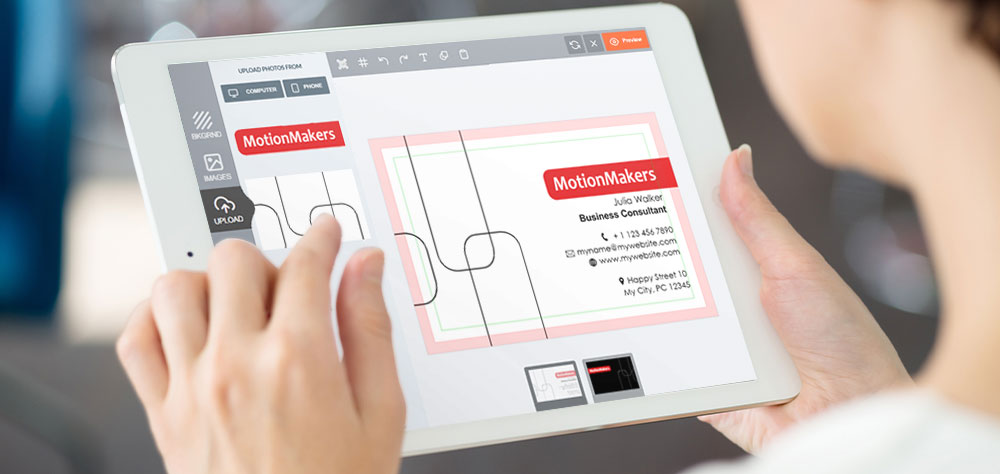
Happy Tip #3 - Upload je Fotos
Wil je een ontwerp dat niemand anders heeft? Gebruik de Online Editor dan om je eigen ontwerp te maken. Als je de Online Editor opent, zie je dat je je eigen foto's kunt 'Uploaden', zie tabje aan de linker kant van het scherm. Deze kunnen worden geüpload vanaf je computer en zelfs vanaf je telefoon, zelfs als je op je computer werkt.
Nadat je de 'Telefoon' hebt geselecteerd om je foto's te uploaden, hoef je alleen maar de QR-code te scannen met je mobiele telefoon, de foto('s) op je telefoon te selecteren en te uploaden. Je kunt je foto's ook importeren van Facebook en Instagram. Online bewerken was nog nooit zo eenvoudig.
Happy Tip #4 - 'Netjes binnen de lijntjes kleuren'... of niet
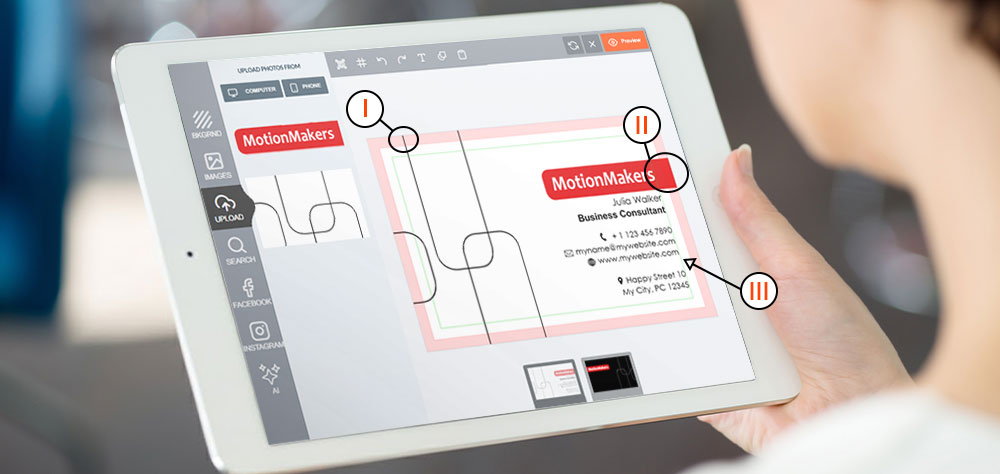
Het rode gebied (rand) aan de buitenkant van het product/ontwerp wordt de 'Afloop' genoemd en wordt afgesneden wanneer we je product op de juiste maat snijden. Als je een achtergrond of een afbeelding uploadt en deze op je ontwerp plaatst, en deze tegen de buitenkant van je product/ontwerp plaatst, waardoor het rode gebied ('Bleed') wordt geraakt, zorg er dan voor dat de afbeelding in het rode gebied, in de 'Afloop', doorloopt (zie I en II).
Als de afbeelding niet in het rode gebied ('Afloop') doorloopt, kan het gebeuren dat je drukwerk op die plek een 'witte rand' toont wanneer we je product op maat snijden en mogelijk een mm breder snijden dan bedoeld (dit komt omdat we bij het snijden van het product niet precies op de mm nauwkeurig op de 'snijlijn' kunnen snijden, dus als we dan een beetje naar links of rechts snijden, is het nog steeds in orde en zal er bijvoorbeeld geen witte rand rond je product zichtbaar zijn).
Als je tekst of een logo op je ontwerp plaatst, zorg er dan voor dat je binnen de groene lijnen blijft (de zogenaamde 'Veiligheidsmarge', zie III). Dit is om te voorkomen dat je tekst, logo, ... te dicht bij de rand van het product komt, want dat ziet er niet mooi/professioneel uit. Als het tegen het rode gebied ('afloop') wordt geplaatst, kunnen er dunne delen worden afgesneden wanneer het product op maat wordt gesneden (wederom vanwege de nauwkeurigheid waarmee we je product op maat kunnen snijden).
Niet voor alle producten worden de 'Afloop' en 'Veiligheidsmarge' getoont, daar is bovenstaande dan dus ook niet van belang!
Happy Tip #5 - Vergeet het design voor de rest van jouw product niet!
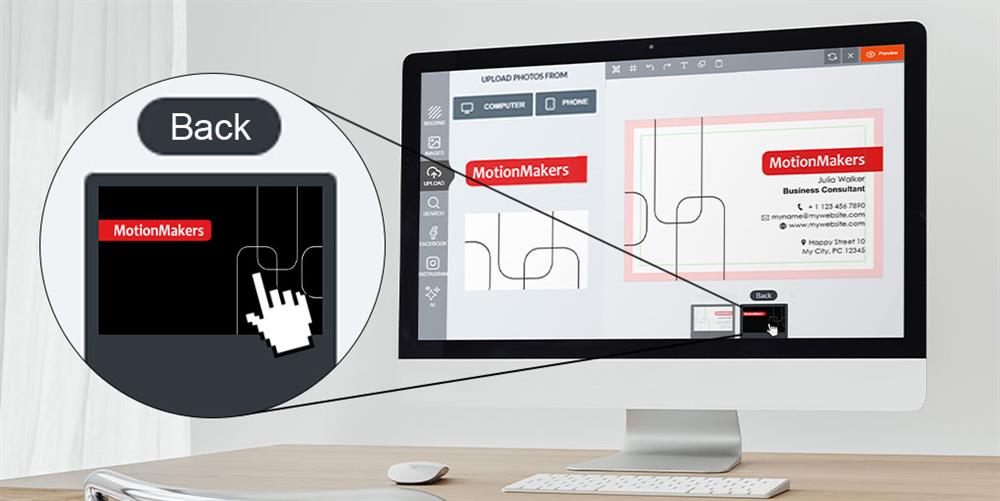
Dit lijkt misschien voor de hand liggend, maar het is gemakkelijk te vergeten! Je kunt wisselen tussen de voor- en achterkant, de buiten- en binnenkant van je productontwerp door op de miniaturen onderaan de pagina te klikken. Vergeet niet om alle zijdes/pagina's te bekijken en te ontwerpen!
Veel plezier met ontwerpen en als je na het lezen hiervan nog vragen hebt of als je onze persoonlijke hulp nodig heeft bij je ontwerp, neem dan gerust contact met ons op!
You design...
We Print, You Smile!